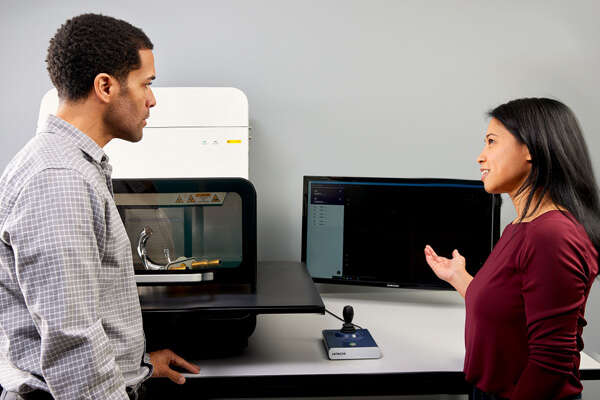
As machines get smarter and become more autonomous, manufacturers are fully embracing Industry 4.0. The plating industry adopted automation decades ago and has since increased its utilization in job tracking, scheduling, material movement, data management and report generation, amongst other functions.
However, with quality control, integration has been much slower, as it’s still commonly standalone equipment in a lab. Whilst many material analyzers come these days with connectivity enabled, the FT230 benchtop XRF (X-ray fluorescence) analyzer helps to make it easier to bring coating measurements closer to the plating line and to get your results to decision makers even quicker so quality control can keep pace with production.

Here’s four ways we’re helping you be ready for Industry 4.0 for both data and diagnostics:
Featuring an all-new user interface called FT Connect and underlying software architecture, it’s easier than ever to integrate your XRF into your plating line. The FT230 is designed with a slotted chamber to allow continuous plating lines to pass directly under the X-ray tube and detector. With help of X-API, measurements can be triggered on-demand, at a pre-set frequency or as the line is stopped to place a part in the XRF. The instrument can work similarly if it’s offline. Parts can be placed into the FT230’s chamber by an autonomous machine and measured according to set measurement patterns and instructions.
If you’re not ready to make the leap to automated QC testing, the FT230 has plenty of features to get you to your results faster. XRF analysis time has always been fast – typically just a few seconds – but before the analysis starts, operators spend minutes setting up the result. They need to decide which calibration to use, which spot size is appropriate, where to take measurements, how best to focus each location and what to do with the results once the analysis is complete.
The FT230 can perform all of these tasks in a matter of seconds using the automated focus and Find My PartTM features.
Auto approach measures the distance from the X-ray tube to the part and automatically drives the tube to the predefined working distance. Auto focus, sometimes called distance-independent measurement, also measures the distance from the X-ray tube to the part, but instead of moving the tube, it keeps the tube at the same height and uses that distance to correct for the new geometry. Both have their uses, and with either one you can drastically speed up your testing program saving one to two weeks individually or up to three weeks annually if using both features.
For Find My Part™, the operator calls up the part being measured either by name, QR or barcode scan (as set by your ERP system) or by machine vision and the entire measurement routine – including data handling and reporting – is automatically set and ready. This can save you days of setup time over the course of a year and shortens the lag between pulling the part for analysis and making decisions about what if any adjustments need to be made to the plating line.
Whether the instrument is inline or offline, you need your coatings XRF results as quickly as possible, and you want them to go to specific places. Maybe it’s as simple as a report for a customer or dropping the data into a networked folder where the quality manager compiles and reviews it, or maybe you’re sending your data to a quality management system (QMS), supervisory control and data acquisition (SCADA) system or directly to your manufacturing execution system (MES).
The FT230 has you covered. Analytical results can be sent automatically at the end of a measurement or batch of measurements to local or networked locations using spreadsheet or JSON format. The data that is reported is configurable from FT Connect to include the information you need.
A key aspect of an integrated, smart factory is monitoring instrument health to anticipate failures and plan necessary service to fit your reschedule rather than reacting to unexpected downtime.
The FT230 has several features to help with this evaluation.
Health check
The instrument comes with a reference standard that is measured to perform a health check, which looks at the status of key components like the X-ray tube and detector.
Daily check
There’s also a daily check routine that compares the results from calibrations over a period of time to see if the instrument is experiencing any drift that requires attention, either in the form of recalibration or hardware maintenance.
On-board diagnostics
The on-board diagnostics runs additional tests to collect more comprehensive information about the state of the instrument. This diagnostics data can be shared with Hitachi’s engineers electronically, including directly via ExTOPE Connect, Hitachi’s secure, cloud-based service.
This is the fastest way to get the data to our engineers so they can review your instrument and work to pinpoint the exact problem area before going on-site, helping to ensure that the right parts are available to the engineer and getting you running as quickly as possible.
Through these new features, we’re making data management and analysis capabilities of the FT230 accessible to all customers to help decrease failure rates, reduce scrap and waste, and ultimately deliver a smarter, more efficient and sustainable business.
Ready to find out how we can help you digital transform your business?
Find out more Talk to our experts
You might also be interested: