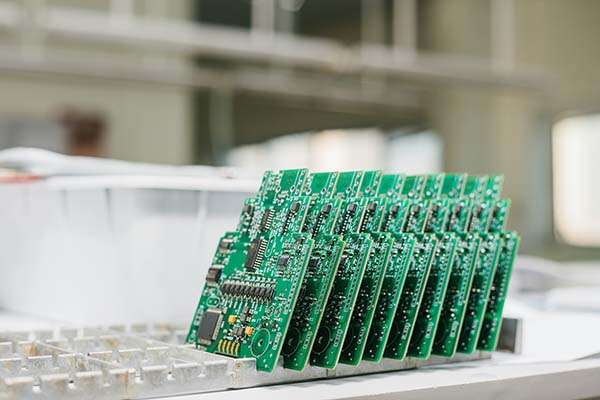
XRF analysis of electronics coatings is a well-established technique. Non-destructive in nature and able to analyze sub 50 µm feature sizes, XRF instruments are at the heart of quality control programs in many electronics plating facilities. However, the fact that these instruments are so easy to use can give a false sense of security around results. This is such an important issue for the integrity of electronics surface finishes, that the IPC-4552A ENIG specification states: The instrument used to measure deposit thickness – and therefore determine the reliability of the whole procedure – must be accurate.

Electronics coatings serve two main functions, to prevent corrosion of the underlying copper and to provide a highly conductive contacts (which may include finishes that must be solderable). Many configurations are multi-layer, such as the ENEPIG configuration (electroless nickel + electroless palladium + immersion gold). Each of these layers must be within a certain thickness. For example, the palladium layer is there to prevent diffusion from the nickel layer to the gold layer. The palladium layer must be thick enough to do this job, but if it’s too thick, the solder joint may become brittle and eventually fail. Every layer must be within upper and lower limits, even if the upper limit is more to do with optimizing cost than performance.
The reality is that a certain amount of housekeeping is necessary to make sure that the coating thickness reported by your XRF analyzer is representative of the actual thickness. The good news is that once established into your standard maintenance and quality control procedures, the steps you need to take are straightforward and will keep your XRF instrument delivering reliable results for years.
Let’s look at what you need do to your XRF analyzer in order of most frequent to most infrequent.
Your XRF analyzer will have one or several routine instrument checks that you can run on the instrument. The manufacturer will have recommended the interval at which these checks should be carried out for optimal performance – make sure you keep to the recommended schedule. These checks focus on whether the instrument hardware is performing as expected; things like X-ray intensity, detector performance and stability are all checked. When the instrument detects minor changes (all XRF instruments drift over time) it has a way to make adjustments to keep your results accurate.
If you leave it too long between running the routine checks, you may not notice that the instrument has drifted – conversely, if you run your corrections too often and unnecessarily, then you risk introducing errors. Basically, the best thing to do here is follow the advice from the manufacturer.
Once you’ve run the routine instrument check, you’ll need to verify your calibrations before using the XRF for routine production analysis. You can use known production parts or use a reference (or standard) from an ISO 17025 accredited lab.
And while we’re on the subject of calibrations, you must ensure that your calibration sample is representative of your production samples. As XRF is a comparative method where the intensity of the X-rays is matched to a known composition and then this information is used to gauge the thickness of unknown samples, the initial calibration is everything. From the substrate composition to the composition and thickness of the coated layers, you will only get reliable production results if your instrument has been calibrated using representative samples.
While the routine instrument checks go a long way to ensuring the analyzer compensates for any ‘drift’ over time, a regular, annual re-certification with a trained engineer helps to ensure the analytical components are in good health. The engineer will review your XRF analyzer and run diagnostics before giving you recommendations on whether any components need changing or give your analyzer a clean bill of health.
Routine instrument checks, verifying calibrations and re-certification as part of the annual service should be all you need to do to make sure the instrument is performing well.
If you are interested in other ways you can ensure reliability from your XRF, such as reducing operator error or the importance of a stable analysis environment, then you can download the free guide: Understanding your XRF: A Guide for Electronics Plating
In addition to discussing the best XRF technology for your application, this comprehensive guide includes:
Download your guide below.
Get in touch